Building a RIMS homebrewing system for less than a tenner
The idea behind a RIMS (Recirculating Infusion Mash System) is that you utilize a pump to recirculate the mash in the mash tun over some sort of direct heat. The direct heat can be either an electric heating element or over a gas burner.
I first started out brewing beer a few years ago using a kit from the Brooklyn Brew Shop. These awesome little kits are the perfect size for beginner brewers, as they have all the gear you need and the right amount of ingredients and they are all-grain too. As I’ve learnt more and more about homebrewing, the scale of my brewing has gone from 1 gallon, to 3 gallon and now up to 5 gallon.
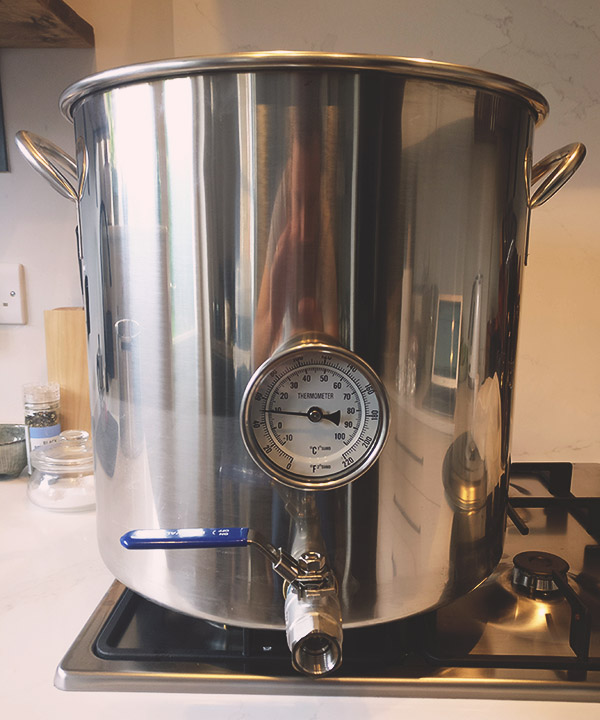
In order to maximize on space, and minimize on the amount of equipment needed, I have been using the Brew-in-a-Bag (BIAB) method for quite a while now. My current kettle looks a little something like the image below. It is fitted with a ball valve and a weldless temperature probe.

Over time I’ve tweaked and adjusted the kettle to suit my needs, and as you can imagine, have tried to upgrade it as much as possible. I’ve always fancied the idea of converting this into an electric brewing system, but never quite had the budget to go full hog.
What is a RIMS system?
The idea behind a RIMS (Recirculating Infusion Mash System) is that you utilize a pump to recirculate the mash in the mash tun over some sort of direct heat. The direct heat can be either an electric heating element or over a gas burner.
But what are the benefits of doing this? Well, because the wort is constantly recirculated, it means that you get a much clearer wort than you would by manually performing a Vorlauf. It also makes sense to think that you get a much more improved brew house efficiency by constantly moving the water through the grains. Some people take this further and control the heating element with a temperature probe, ensuring that the get predictable brewing results every time.
I’ve been watching a lot of Youtube videos about homebrewing recently, and one of the things that crossed my mind was the concept of buying a cheap pump and using it to recirculate the mash. I looked on Amazon, and it turns out that a cheap 12V brushless water pump costs less than a tenner (in British Pounds). There are some beautiful Chugger and March pumps available for homebrewers today, but to be honest I couldn’t quite justify the price tag at this stage of my brewing career.
I opted to buy this USB Brushless water pump on Amazon. The good thing about this pump is that it doesn’t need to be submersed in order to run - it requires an in and out flow that can be connected using PVC tubing. It handles temperatures of up to 100 celsius, making it perfect for your mash. The only downside about this little pump is that it is not self-priming, which means that you will need to ensure that the tube lines have wort in them up to the pump - from there on it will run on it’s own.
The only downside about a 12V pump is that it doesn’t run at the same voltage as your electrical mains, which means you will need to adjust it slightly. There are a few options online; some of them involve car batteries, some involve a converter plug, but for my case the USB option was perfect for my needs. I had a USB battery charger lying around in the house which provided the perfect power supply for this little pump. If I gave the USB charger a full charge, it was easily able to pump a full 60 minutes. There are a few options available online that you can buy for a few quid.

When I bought this pump, I was also a little sceptical about whether or not it would work. I didn’t want to drill my kettle unless I really needed to, so for the first brew I simply ran the out tubing to the top of the kettle and through the brew bag. With the lid covered, the pump chugged away happily.

Overall I was very impressed with this little pump. One of the major concerns I had about not drilling the kettle was heat loss, but it turns out that I only needed to add a burst of heating during the full 60 mins - not bad at all. I’m sure that I’ll get around to drilling the kettle one day, but for now I am happy with the results.
Things to keep in mind
- It took me a little while to figure out that the pump needed to be primed before it worked properly. It’s a low power pump and needs a little bit of a nudge to get started.
- Find a way to clip the tubing to the kettle - if you bump the tubing and it falls loose, it can easily start spraying your wort all over the place!
- Ensure that your PVC tubing is capable of handling high mash temperatures. Not all tubing is created equal and can easily melt.
Summary
Overall, I am very pleased with this little pump. For less than a tenner, I am able to recirculate my wort during the mash process and get the best out of my grains.
It only takes a few minutes to set up at the start of a brew day and is no hassle. I'm sure that as I scale up, I'll need to get a bigger pump, but for now this does the trick. Happy days!
